Build a Sourdough Starter in Three Small Experiments
Why sourdough? A short historical note
Sourdough is one of the oldest ways people leavened bread. From the Nile valley through medieval Europe to the baking houses of the 19th century, communities relied on naturally fermented doughs long before commercial yeast was produced. That history matters today: keeping a starter is a living connection to older kitchen practices, and learning to maintain one builds observation and timing skills that improve all kinds of home baking.
How these experiments are structured
Rather than a single long recipe, this article breaks the process into three brief experiments. Each experiment is designed to be completed in a day or two, with simple goals and clear observations. Do them in order: each step builds on the last so you gain confidence without feeling overwhelmed.
What you need
- One clean jar (250–500 ml) with a loose-fitting lid or cloth
- Flour: plain wheat flour works well; whole-grain flour tends to ferment faster
- Room-temperature water (chlorine-free if possible)
- Kitchen scale (recommended) or measuring cups, spoon, rubber band, and a spoon for stirring
Experiment 1: Capture and observe (Day 1–2)
Goal: See the very first signs of natural fermentation and get comfortable making a simple flour-water mixture.
- Mix 50 g flour with 50 g water in the jar until a thick batter forms. If you don’t have a scale, aim for roughly equal parts by volume—about a few tablespoons of each to start.
- Cover the jar with a cloth or place the lid loosely so gases can escape. Mark the level of the mixture with a rubber band.
- Leave at room temperature (ideally 20–24°C / 68–75°F) for 24 hours and observe.
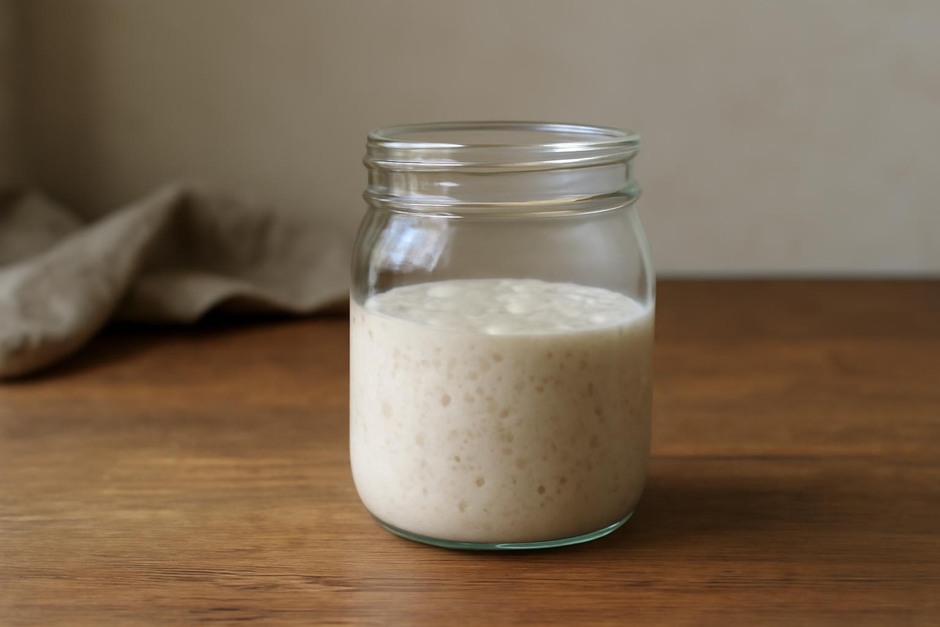
What to notice: small bubbles, a slightly tangy smell, or no change. It’s normal if nothing obvious appears—this experiment is about learning to observe. If you see a thin grey or pink layer, discard and clean the jar; try again with freshly cleaned equipment and possibly different flour.
Experiment 2: Feed and track growth (Days 3–6)
Goal: Encourage the community of wild yeasts and bacteria to grow and learn a simple feeding routine.
- On Day 3, discard half the mixture and add 50 g flour + 50 g water; stir well. Mark the level again.
- Repeat the discard-and-feed step every 24 hours for 3 days. Keep the jar at a steady room temperature.
- Each day note the time when you feed, the rise in level, the smell (sweet, sour, yeasty), and how many bubbles you see.
What to expect: by day 4–6 you should see the starter double in volume a few hours after feeding and develop a pleasant tangy aroma. If growth is sluggish, try placing the jar in a slightly warmer spot (near but not on a heat source). Whole-grain flours and rye often speed up activity.
Experiment 3: Test with a small bake (Days 7–10)
Goal: Use a portion of your starter to leaven a simple batter so you can assess strength without committing to a large loaf.
- When your starter reliably doubles within 4–8 hours of feeding, you have an active starter. Take 20–30 g of active starter and mix with 100 g flour and 80–100 g water to make a thick pancake-style batter.
- Let this batter rest for 4–8 hours. You should see bubbling and some rise.
- Cook small pancakes on a hot griddle or skillet. Note texture, flavor, and rise compared with a non-fermented pancake.
Why this matters: a successful fermented pancake shows the starter is producing gas and flavor. Adjustments are easy—if pancakes are flat or lack tang, try feeding the starter more often or keeping it warmer before using.
Troubleshooting and simple maintenance
Spot checks:
- No activity: try warmer temperature, use a portion of whole-grain flour, or extend the feeding schedule.
- Unpleasant smells or discoloration: discard and restart; clean your equipment thoroughly.
- Too sour or very runny: feed more frequently and adjust hydration (use slightly less water).
For routine maintenance once your starter is established, a daily discard-and-feed on the counter works if you bake often. For occasional baking, refrigerate the starter and feed it once a week.
Next steps
After these experiments you’ll have three useful outcomes: a working starter, a simple feeding routine, and confidence to test it in small bakes. From here you can progress to a basic loaf, explore different flours, or learn timing for longer cold ferments. The historical thread—making bread with natural leavening—remains the same, but these small modern experiments let you learn at a manageable pace and bring a living tradition into your kitchen.